Kiwi Calf Feeding System
This is a four point summary of our brochure which you can find as a PDF format attachment at the bottom of the page.
* About Kiwi Calf
* Why Kiwi Calf Is Better
* Set Up and Tips
* Getting Started
About Kiwi Calf
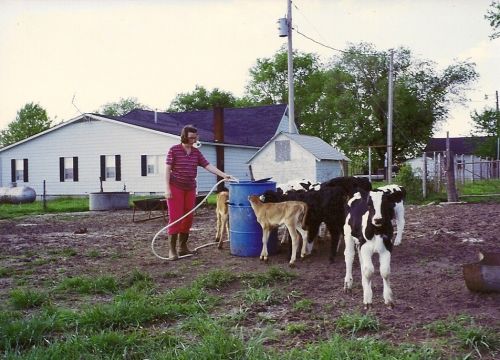
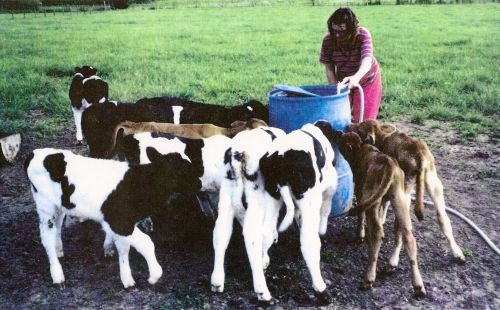
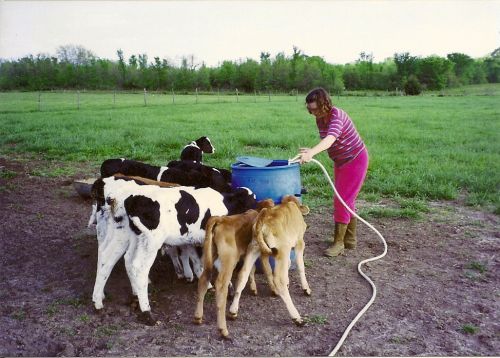
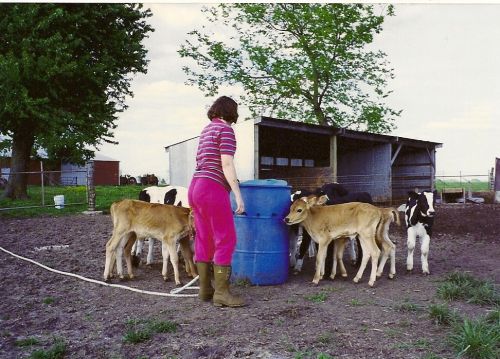
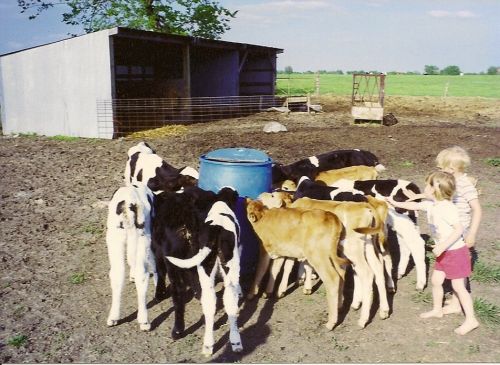
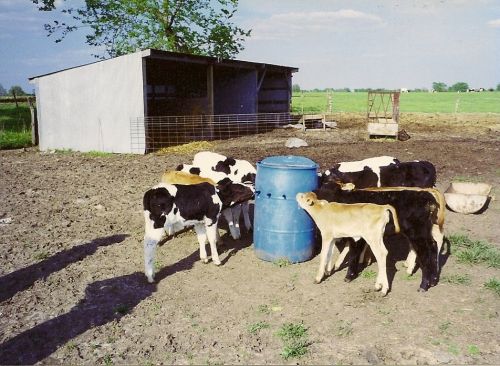
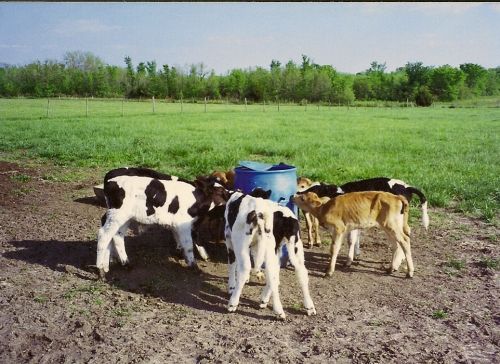
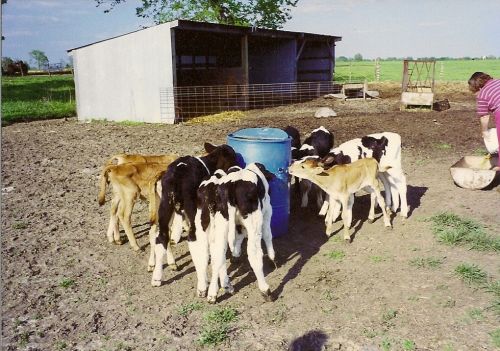
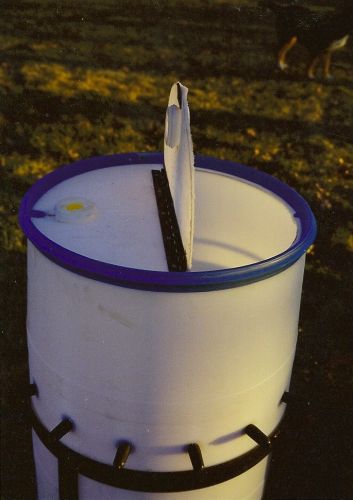
The Kiwi Calf System is a simple, effective and economical method for feeding calves with milk or milk replacer. It consists of three essential elements:
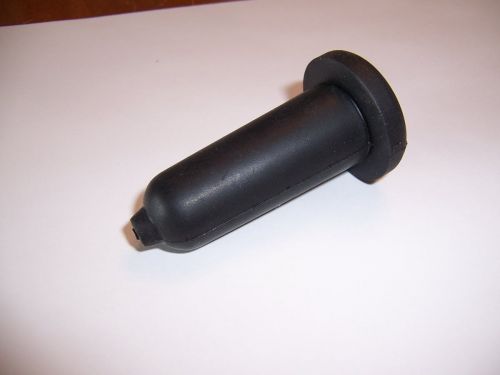
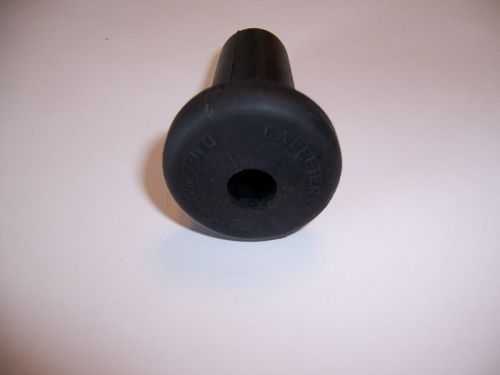
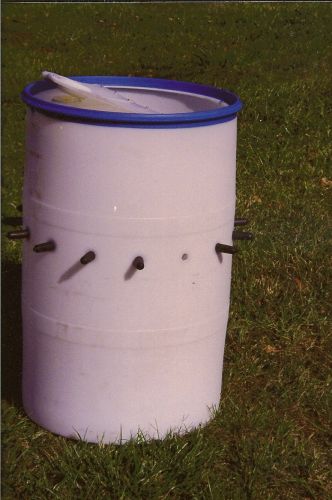
* A heavy duty rubber nipple and a 30" long PVC tube set into a 55 or 35 gal plastic barrels or a 5 gal. plastic bucket
* A fenced paddock, ideally with grassy areas
* A shelter to protect the calves from heat, rain, snow and wind
Why Kiwi Calf Is Better
Cattle are herd animals who need the social interaction with each other. Therefore, it is unnatural to keep them in solitary confinement in a very small area as is typically the case with the hutch rearing method. In addition, the constant defecation and urination in a small area create the kind of unhealthy environment that can lead to frequent bouts with scours.
During the first 6 weeks, a calf's nutrition, i.e. milk or milk replacer, bypasses the rumen and goes directly in the fourth stomach. If the calf drinks with its head down out of a bucket or a bottle held below head level, some milk wil end up in the rumen where it cannot be digested and is wasted.
Set Up and Tips
You need:
* Plastic barrel: 35 or 55 gal
* Nipples w/30" tubing: 12 nipples for 35 gal and 15-18 nipples for 55 gal drums
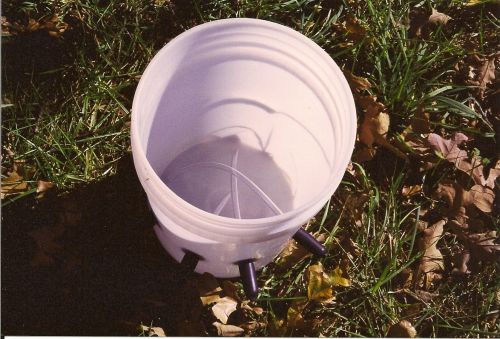
* Training bucket: a 5 gal plastic bucket with 2-4 nipples
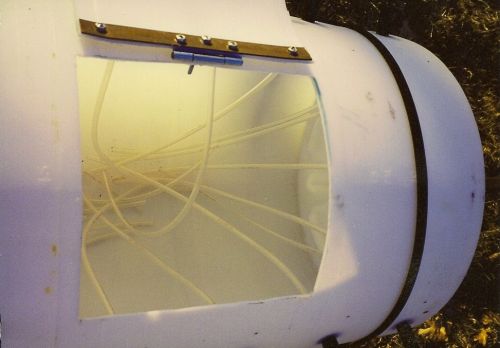
- Installing nipples and tubing: Nipples are designed to be inserted into 3/4 inch holes drilled in the side of the barrel 24" above the barrel bottom. Fully insert the tubing before pulling the nipples through the holes; this will lock the tubing in and prevent it from falling out. Always have more nipples than calves, because stronger calves will push weaker ones away. Thus, on a barrel with 15 nipples no more thant 12 calves should be fed
- 55 gal barrels are the most popular and most easily available size
- To keep the barrel from being knocked over by the calves, drive a steel or wooden fence post in the ground and secure the barrel with a rope.
- To keep the PVC tubes from curling up at the bottom of the barrel, a galvanized nut can be slipped over the end of the tube to give it more weight and to keep it down.
- Once the calves have finished drinking the milk, water can be added to allow the calves to suckle in between feedings, thus helping to prevent calves from sucking on each other and also to clean out the tubes and nipples.
Getting Started
- Once you have the nipples installed in the size of barrel of your choice and have the calf paddock and shelter ready, you can start using the Kiwi Calf Feeding System.
- Most calves will readily take to suckling on the barrel mounted nipples. For those that are reluctant and just don't seem to grasp the concept, you can introduce them to the barrel system by starting them on a 5 gal bucket.
- When setting up the 5 gal bucket, install the nipples 5" from the bottom with tubing long enough to reach the bottom; then put the milk to the level if the nipples so, when the calf hits the nipples, it immediately gets milk. As the milk level drops, the calf learns to overcome the delay in milk coming off the bottom.Once they drink from the bucket, it usually does not take much to transfer the skills acquired on the bucket to the barrel. The bucket can be hung from a post above the level of the calf's head.
Click HERE for the Kiwi Calf Feeding System brochure


.jpg)


.jpg)
|
© 1999-2025, Frank & Brigitte Rhinehart All Rights Reserved Privacy Policy | Copyright |
|